Outing Camp

Author name: Ahad

Wild Camping
Camping

Wild Camping: Embrace the Untamed Adventure in 2024

Wild camping, often called “free camping” or “dispersed camping,” is the ultimate escape into nature. It offers a raw and immersive experience, allowing adventurers to connect deeply with the wilderness, embrace self-sufficiency, and explore untamed landscapes away from bustling campgrounds and crowded trails.
Wild Camping scene

What is Wild Camping?

Wild camping involves setting up camp in undeveloped areas, such as forests, mountains, riversides, or lakeshores, typically outside designated campsites. Unlike traditional camping, it provides the freedom to pitch a tent or park a camper van in secluded spots. Regulations regarding wild camping vary by country and region, so understanding local laws is crucial for a positive experience.

Why Choose Wild Camping?

1. Freedom to Explore:

Wild camping is often free, making it an ideal choice for budget-conscious travelers.

2. Connection with Nature:

Immerse yourself in the symphony of nature—rustling leaves, chirping birds, and flowing streams.

3. Budget-Friendly Adventure:

Choose your perfect campsite, whether it’s a scenic mountain view or a secluded forest glade.

4. Personal Growth:

Develop survival skills, practice self-reliance, and enjoy the simplicity of life in the wild.

How to Prepare for Wild Camping?

1. Research and Plan:

  • Use maps, apps, or local knowledge to identify potential camping spots.
  • Check regulations for wild camping in your chosen area.
  • 2. Pack Smart:

  • Carry lightweight, durable gear: a tent, sleeping bag, and cooking equipment.
  • Bring sufficient food and water, or plan for water purification from natural sources.
  • 3. Follow Leave No Trace Principles:

  • Minimize environmental impact: pack out all trash, avoid damaging vegetation, and respect wildlife.
  • 4. Stay Safe:

  • Share your plans and estimated return time with your friends or family.
  • Carry a first aid kit, navigation tools, and a reliable communication device.
  • Top Tips for Wild Camping Success

    1. Arrive Early

  • Set up camp during daylight to familiarize yourself with the surroundings.
  • 2. Blend In:

  • Choose inconspicuous locations away from private property or busy trails.
  • 3. Respect Quiet Hours:

  • Maintain the tranquility of the area.
  • 4. Be Weather-Wise:

  • Check forecasts and prepare for sudden weather changes.
  • Where to Go Wild Camping?

    Here are some camping destinations around the world:

    1. Scotland:

    Its “right to roam” laws allow camping in stunning locales like the Highlands, Isle of Skye, and Cairngorms National Park.

    2. Sweden:

    The “Allemansrätt” (Everyman’s Right) permits camping on public lands, offering access to forests, lakes, and archipelagos.

    3. Australia:

    From rugged outback landscapes to pristine beaches, the country is perfect for adventurous camping.

    4. United States:

  • Dispersed camping is allowed in many National Forests and Bureau of Land Management (BLM) lands.
  • Where to Go Wild Camping

    Benefits of Wild Camping for Mental Health

    Wild camping provides a digital detox, reduces stress, and fosters mindfulness. The solitude and simplicity of the experience can boost creativity and help you reconnect with a sense of purpose.

    Challenges of Wild Camping

    While it offers unparalleled freedom, wild camping comes with challenges like unpredictable weather, lack of amenities, and potential wildlife encounters. Good preparation, judgment, and flexibility are essential.

    Wild Camping Etiquette

  • Camp at least 200 feet from water sources to protect ecosystems.
  • Avoid building permanent structures or leaving traces of your stay.
  • Respect the privacy of other campers if encountered.
  • Final Thoughts

    Wild camping combines adventure, self-reliance, and a profound connection to nature. Whether you’re a seasoned adventurer or a curious beginner, it promises unforgettable memories and a deeper appreciation for the wilderness. Step off the beaten path and immerse yourself in the untamed—wild camping awaits!

    FAQs

    No, wild camping laws vary by country and region. Research local regulations before heading out.
    A durable tent, sleeping bag, cooking gear, food, water, first aid kit, and navigation tools.
    Use maps, camping apps, or local advice to locate secluded areas away from private property and busy trails.
    Stay calm, maintain distance, do not feed animals, and store food securely.
    Inform someone of your plans, carry a communication device, check weather forecasts, and follow Leave No Trace principles.
    12 Best Hiking Habits
    Hiking

    12 Best Hiking Habits to Make Your Adventures Easier

    12 Best Hiking Habits to Make Your Adventures Easier

    12 Best Hiking Habit
    I’m going over 12 of these smaller habits to make your next through hike or overnight hike just a tiny bit better in your kit of smaller but useful things. These are the little tweaks and tricks that might not seem groundbreaking but can make a big difference when you’re out there. From packing smarter to staying more comfortable, it’s all about those tiny improvements that add up. Whether you’re a beginner or seasoned hiker, there’s always room to level up your experience. After all, the joy of hiking is in the details—and these habits might just become your new go-to moves. So, grab your gear, and let’s dive into the small stuff that makes a big impact!

    Gear Management

    1. Use Reusable Zip Ties

    Add a few of reusable zip ties because they allow you to attach stuff to your backpack very easily and very securely for example if your spare socks are dirty you can wash them in a nearby stream and then attach them to your backpack with reusable zip ties to dry them out while you’re hiking.

    2. Keep Your Backpack Off the Ground

    If you have a trekking pole tent you can use the same reusable zip ties or a small carabiner to hang your backpack by the trekking pole strap at the top this will make sure that your backpack is off from the ground which is very useful in areas with a lot of rodents snakes and other Creepy Crawlers that might want to get into your stuff.

    3. Pack for the Return Trip

    Gear Management
    Gear Management
    If you’re on an overnight hike or a really long day hike and you’re driving with your car to get there and it’s really helpful to already prepare some stuff for the way back most importantly you probably want to throw in some Crocs or sandals in the car along with a water bottle. This will allow you to wash off your feet and then air them out during the way back, which will feel very nice and refreshing. Some other things that I find really helpful are fresh and comfortable clothing along with some snacks for the long ride back home.

    4. Keep Electronics Dry with Silica Gel

    In your waterproof dry Sack or wherever you hold. All of your electronics throw in one or two of these silica gel packets that you get whenever you order something online and just keep them in there forever because it can avoid any shoes further down the line if you get a small hole in this bag and some moisture gets inside of it.

    Smart Setup Practices

    5. Keep Small Items Organized

    Whenever you’re setting up your tent, pick one empty Sack or bag. I usually use my empty tent pack and then put in there all of the smaller items that you don’t need to avoid losing them in the morning also whenever you take these shorter brakes make it a habit to visually inspect the area at least two times just before you’re leaving because trust me realizing that you’ve forgotten something and then hiking back to get it is not something that I would recommend for anyone.

    6. Hang Your Headlamp

    During the night I always like to hang my headlamp in one of the zippers at one of my tent entrances because that way I always know where it is and I can grab it quickly in case I need it. I know that a lot of people also like to hang it around their necks during the night but in my opinion my solution is a bit better because this can be a bit uncomfortable in certain positions and the headlamp can also accidentally turn on during the night.
    Smart Setup Practices

    7. Keep Fanny Pack or BumBag

    One more habit that in my opinion is really helpful is a fanny pack or a bumbag whatever you want to call it. Because you can store in all of the smaller items in there that you might need to access quickly without taking off the backpack. I usually store in there some hand sanitizer, my phone sunscreen, a wallet, lip balm, some spare batteries for the camera, and some headphones. I also usually carry a large folded up Ziploc bag in here in case it starts raining, so that I can isolate all of my items from becoming wet.

    Sleeping Better Outdoors

    8. Use Earplugs for Peaceful Sleep

    If you want to sleep better during the night do bring a pair of earplugs. Honestly I was a bit hesitant to use them at first because I felt like I needed to be in control and wake up instantly in case something happens but when I slept without them every smallest sound coming from outside of the tent. Even if was made by some small Critter sounded like it was coming from a wolf that’s trying to sneak up on me and trying to break inside of the tent which meant that I was waking up a lot during the night realistically.
    Use Earplugs for Peaceful Sleep
    If you do not have any food inside of your tent or other items with strong smell, then the chances of animals trying to break into your tent are close to zero. So just chill out bring a pair of earplugs and sleep well that said from my own experience when I was through hiking after about maybe 2 weeks. I stopped needing these because I became much more relaxed about sleeping in night tent and I stopped waking up from every smallest sound fun fact.

    9. Stay Cool with a Microfiber Towel

    One thing that you might want to bring, if you’ll be hiking in summer for better sleep is a small microfiber towel just before going to sleep you can dampen it with some water and wipe off all of the sweat and dirt from your body which will make you feel fresh and you will sleep better during the night. Plus if it’s extremely hot outside you can use the same microfiber cloth for another purpose simply dampen it make making sure that it’s really wet do not rinse it out and simply put it over your head and then put on your cap now of course this does look a bit weird but honestly who cares, this will allow you to stay very fresh and cool and hike and even temperatures above 30° C.

    Health and Hygiene

    10. Prevent Diarrhea with Clean Practices

    This is one of the more important hiking habits that I’m going to tell you about. The most important things is our health, and you may face diarrhea during the hiking. This is because diarrhea is the most common health problem for through hikers. I’m not a doctor but I would argue that’s probably because you’re eating with dirty hands or you’re eating contaminated food so before touching your food always use some hand sanitizer to clean off all the bacteria from your hands.
    Hand sanitizer
    Another helpful thing to do here is that whenever you’re boiling some water not every time but occasionally you can add in your knife in there as well as your Spork because boiling it will clean off all the bacteria from the leftover food. And lastly I would also recommend you to avoid using those short through hicker toothbrushes with the cut off end because if you want to get into the most heartreach places in your mouth most likely your fingertips will have to go into your mouth which is a Bad Thing.

    11. Prioritize Foot Hygiene

    Here is the forth and important hiking habit that you should follow, especially for longer hikes I find it really important to take good care off your feet to avoid getting blisters so whenever you stop and take a break first off take off your shoes then take off the socks and turn them inside out and lay them out somewhere in the Sun. So that you air out your feet as well as your socks and reduce the humidity inside of the shoe.
    It’s also really nice to plan your brakes right next to water sources because this means that you can wash off all the sweat and dirt from your feet which greatly reduces the chances of blister formation. Also ideally you always want to sleep with a fresh pair of socks and to do this you can wash your other pair of socks in the morning. Somewhere in a stream or wherever and then attach them to your backpack to dry them out as you’re hiking during the day.

    Morning Routine Hiking Habit

    12. Optimize Your Morning Coffee Ritual

    Personally I like to take down my tent as soon as I wake up and have my coffee and eat my breakfast only maybe 15 or 30 minutes after I’ve started hiking that’s because I found that if I drink my coffee. The first thing in the morning it usually takes about 1 hour for me to start moving which is quite a lot this way if I do it a bit later the coffee break is usually much quicker and also by that time the sun is already up which means that I can choose a better spot to drink my morning coffee with better views with more sunshine and so on.

    Final Thoughts

    These hiking habits are not just practical but can also make your hikes safer, more comfortable, and enjoyable. By implementing these tips and organizing your gear and routines smartly, you can focus more on the beauty of the trail and less on avoidable inconveniences. So, gear up, plan well, and take these habits along for your next adventure! If you have any other hiking habit like this, please share them down comments to help out other people thank you.
    backpacking hacks
    Hiking

    10 Genius Backpacking Hacks That Seem Odd but Work Wonders

    Ever wondered how a few quirky tricks could completely transform your backpacking experience?” From a silicone-enhanced sleeping pad to a no-slip pillow trick, these clever tips might sound strange at first, but they solve common problems every backpacker faces. Say goodbye to sliding around in your tent or waking up to adjust your pillow—let’s dive into these practical hacks that make your outdoor adventures smoother and more enjoyable!

    Here are 10 backpacking hacks that might not make a lot of sense at first but actually are extremely useful.

    1. Silicone Dots on Sleeping Pads

    Silicone Dots , backpacking hacks
    You might be wondering why the bottom part of my sleeping pad is covered with small dots well I put them there myself using store bought silicone to keep the sleeping pad from sliding inside of the tent during the night otherwise I would always keep sliding over to one side. This trick will level up your backpacking game effortlessly.

    2. No-Slip Pillow Trick

    Another problem is your pillow, because it always wants to slide off from your sleeping pad and then you wake up to correct it but luckily you can
    fix this quite easily by putting your spare t-shirt over both of them or any other shirt or jacket that you aren’t wearing.

    3. Extra Water Bottle Cap

    During the night I always carry an extra water bottle cap in my kit which is meant for two things mainly I use it to put on top of my t Stakes so that they don’t dig into my hands or feet when I’m pushing them into the ground. And secondly itacts as an emergency backup in case I lose one of the caps for my water bottles.

    4. Pot Cleaning Trick

    A small hack that makes your backpacking adventure so much easier. To clean out my pot I use a small piece of netting that I cut out from the plastic net bag that a lot of vegetables usually come in it does a really good job of scraping everything off its smaller than a sponge and I prefer it over pine needles which I know that a lot of people use because I don’t want to look for Pines every time that I want to wash my pot having something small like this is ideal.

    5. Olive Oil

    You should carry olive oil when hiking you need to get a lot of calories because you burn a lot of them and the easiest way to do that is by adding fat to your meals because it contains more than two times the amount of calories per gram compared to carbs and protein olive oil. Specifically contains more than 100 calories per tablespoon which means that I need to add just a few tablespoons to each of my dinner to reach the desired calorie amount and keep on hiking the next day.

    6. Volume Measurements

    Hikes for pots that don’t have any volume measurements. You can scrape them yourself on your spork. If you won’t scrape off any Coatings from the pot, you could also Mark them on your water bottle but I personally prefer to do it on my Spork because I tend to change my water bottle every now and then and then I have to redo all the markings on my specific Spork I’ve made two markings one for one cup of coffee or 200 ml and one for two cups of coffee or 400 ml.

    7. Check Ground Level

    Before setting up my tent I always place a half full plastic bottle on the ground which allows me to quickly determine if the ground is level or not to do this first adjust the water bottle so that the water inside of it is sitting straight then simply go around the water bottle and check that it’s sitting at a 90° angle relative to the ground if it isn’t the ground isn’t straight this allows me to determine whether a specific campsite is good or not and compare it to other campsites in the area.

    8. Clean Before Setting up

    A lot of times selecting a good campsite especially here in the mountains is a bit tricky because from the distance the ground may seem level at first but it actually isn’t after cleaning up the ground. I always lay out my tent fabric on it first and then lay on it myself this way, I can easily find out in which direction my sleeping mat feels the most comfortable in and also find out if there aren’t any holes or rocks in the ground that I need to take care of first.
    Clean Before Setting up

    9. Hang Your Flashlight At Safe Place

    At night I always keep both zippers for the tent inner mesh on the upper side and hang my flashlight between the cords on both of these zipper pools that way if I need to find it quickly. I always know where it is, plus if I line it properly it also acts as a lantern giving up enough light for the whole tent and if you wear glasses you can also hang your glasses here for the same reasons.

    10. Keep Dry You Socks

    If I need to drive some socks from hiking in rain all day I always put them underneath my shirt because my torso is very warm and it ensures that they’ll be completely dry by the morning. But before you start typing that it doesn’t work please try yourself and compare it to other methods, because I’ve tried them all myself and I know that this is the best technique by far it’s pretty disgusting obviously but it works.
    You can make your backpacking journey hassle-free by using this simple yet effective trick. By the way if you want to know which hiking socks are best for me, you can read me blog Best Hiking Socks. if you know of any other weird or uncommon backpacking hacks please write them down in the comments to help out other people.
    20 Solo Hiking Safety Tips for Beginners
    Hiking

    20 Solo Hiking Safety Tips for Beginners (No BS or Fluff)

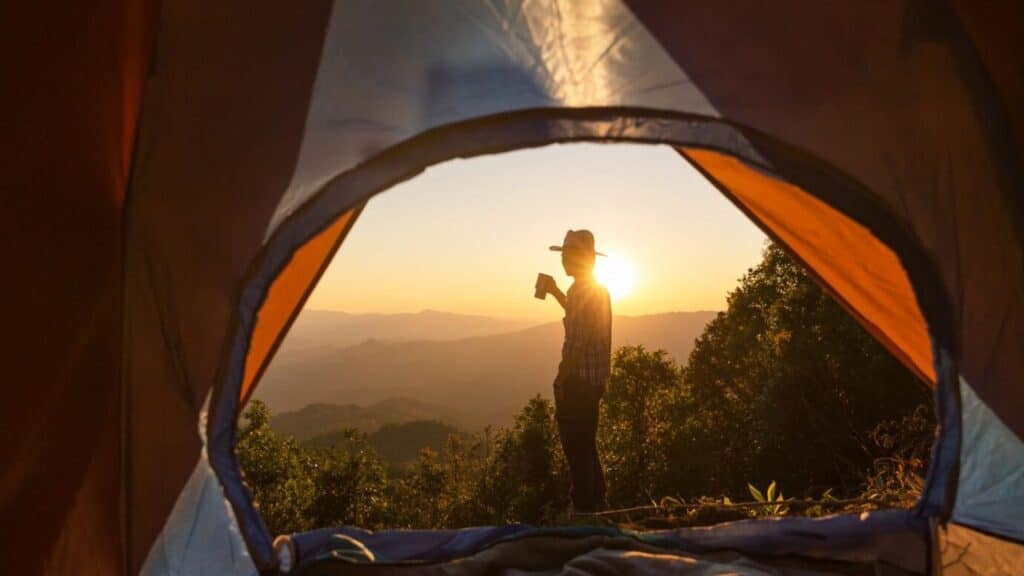
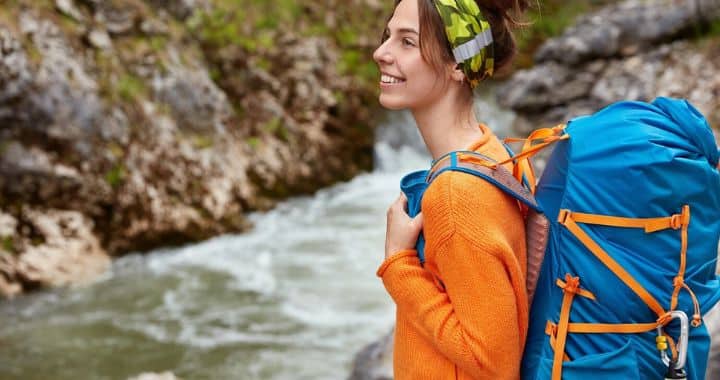
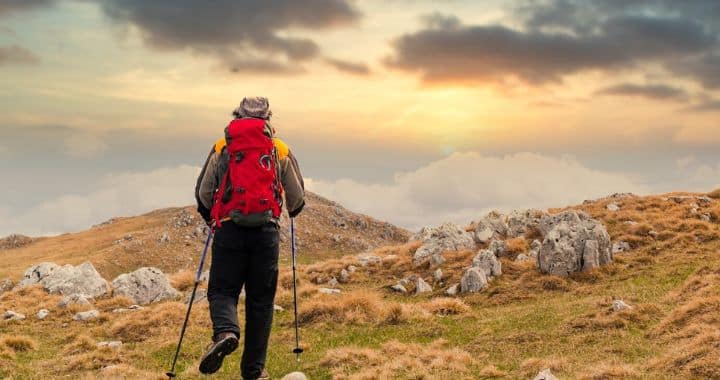
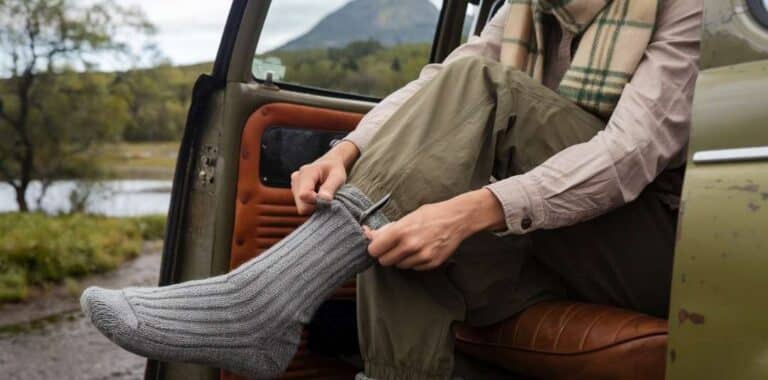
    Solo hiking can be one of the most rewarding experiences, but it’s important to stay safe along the way. As a beginner, it’s essential to prepare well, trust your instincts, and be aware of your surroundings. Always check weather forecasts, carry extra food, and have a backup navigation system. Pay attention to trail conditions and stay cautious near cliffs or wild animals. By following these simple yet effective safety tips, you can enjoy your solo hikes with peace of mind.
    Here are 20 solo hiking safety tips without any BS or fluff:

    1. Guard Dog Safety Tips for Solo Hiking

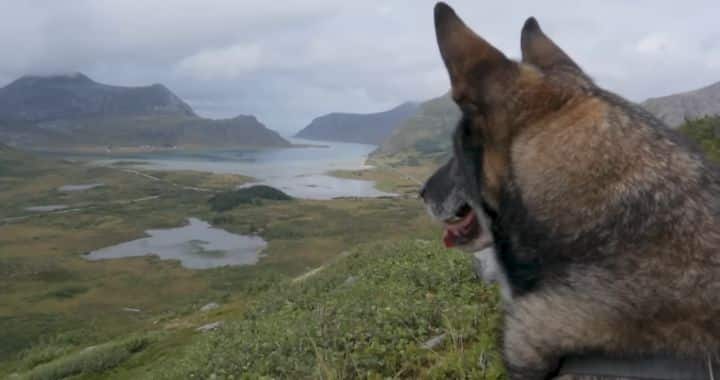
    You shouldn’t be Wary of just wild animals whenever you see horses, cows, goat or sheep alone in the mountains you should always pay a bit more attention because there might be a guard dog somewhere nearby in more popular hiking areas like the Alps or the Pyrenees. Usually they’re very well trained and they’re friendly to hikers but in more remote areas like for example, here in central Italy sometimes they’re very aggressive towards humans.
    Guard Dog Safety Tips for Solo Hiking
    if you see one, always stop and judge the situation first before approaching and determine whether the shepherd dog is aggressive towards you or not if he is slowly back away no sudden movement and go around the herd from a distance that way he probably won’t be aggressive towards you.

    2. Trekking Poles: A Must-Have for Solo Hiking

    When a lot of people start solo hiking they usually want to have something to protect their themselves with and in that case I usually recommend bringing trekking poles in my opinion they’re one of the best tools to protect yourself of course tricking poles are also a multi-use item which is really good for hiking,
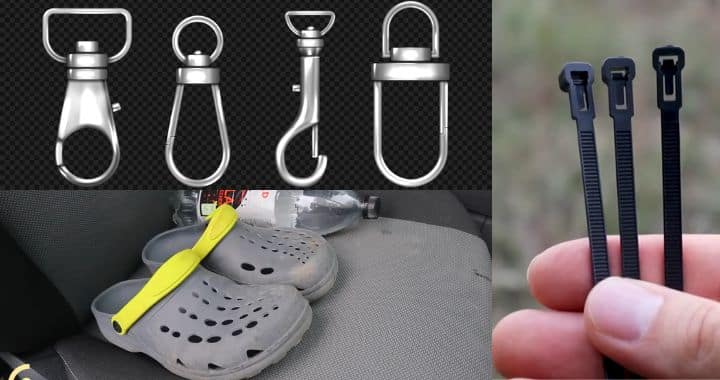
    because you can set up some tents with them and they also greatly reduce the chances of you getting ankle or leg injuries.

    3. Ankle Exercises to Prevent Injuries

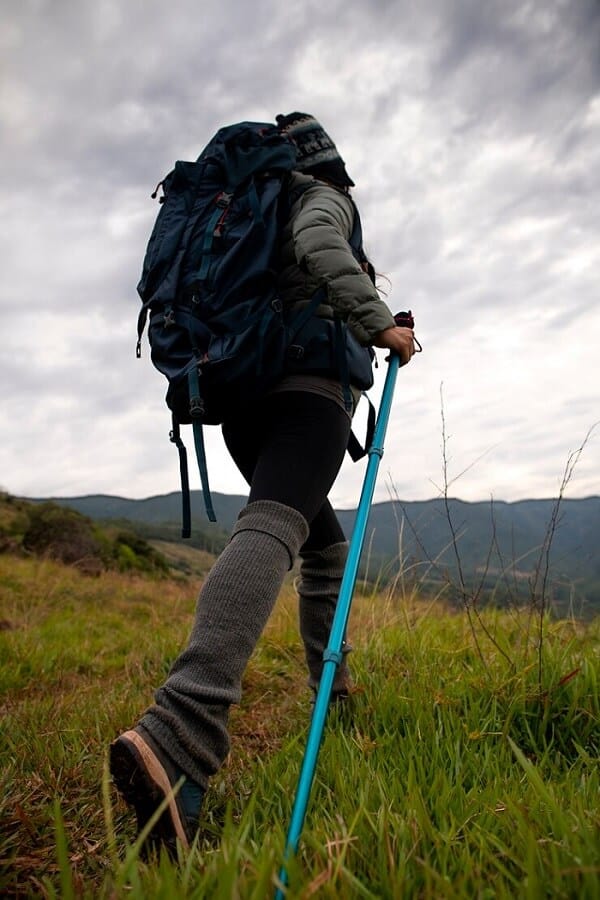
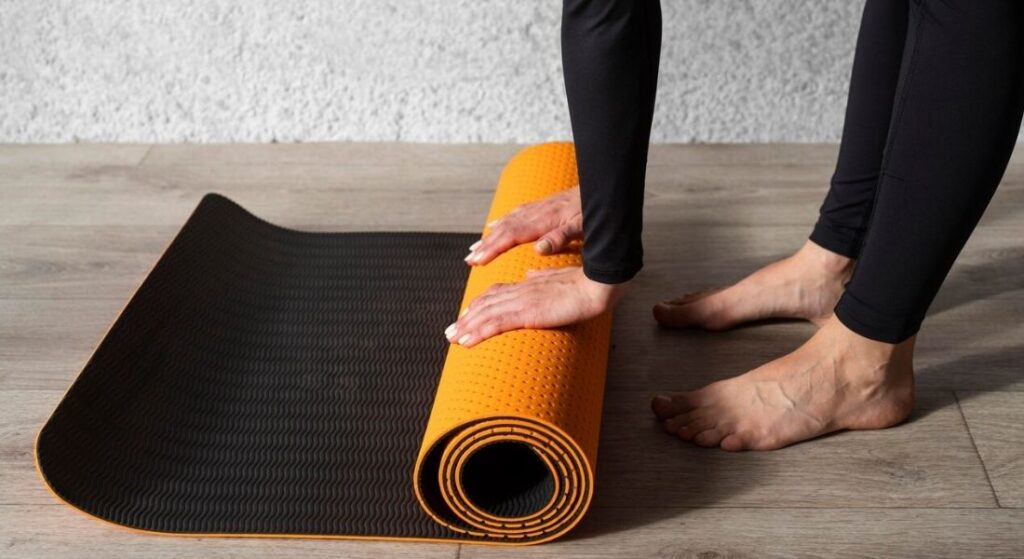
    To avoid ankle injuries, which could develop a potentially dangerous situation if you’re hiking solo, you need to increase the mobility range of your ankles, and you can do that by doing these four exercises: do 20 of these smaller bounces to improve your dorsiflexion, 10 of these stretches to improve your plantar flexion, 10 outward stretches to improve your supination, and another 10 inward stretches to improve your pronation.

    4. Safety Check-Ins for Solo Hikers

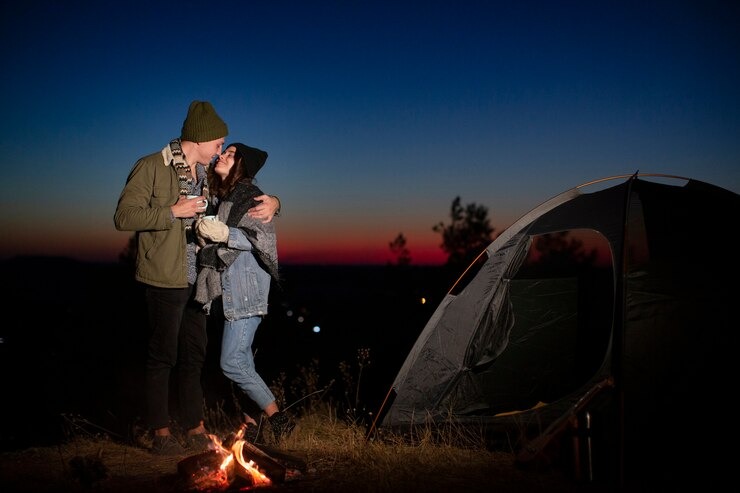
    If you’ll be hiking solo, you should definitely find someone who can alert the authorities in case you go missing. The main idea here is that you’d update them every day, and if they don’t receive any messages from you for a day or two, they would get in touch with a rescue team and let them know that you’re probably lost, or that your phone is dead, and that you just aren’t answering.

    5. Food Storage Tips

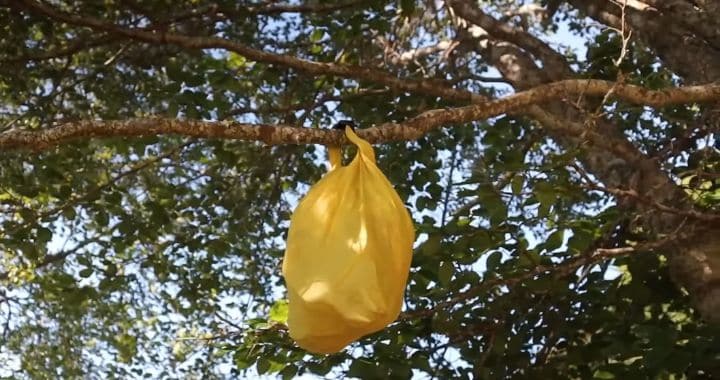
    Even if you don’t live in bear country, you should never leave your food, empty food packaging, your deodorant, and other things that have a strong smell inside of your tent. Here in Europe, you’d mostly do it to avoid wild boar encounters during the night, but depending on where you live, it could be other animals as well. I usually put everything that has smell in a dry sack and hang it up pretty high in a tree, at least 50 m away from my tent.
    Food Storage Tips
    That said, you could probably skip this step if you’re camping very high up in altitude, way above the tree line, because there you’ll usually only encounter mountain goats, foxes, and they’re usually pretty shy and they won’t try to get inside of your tent.

    6. Stay Safe on Public Wi-Fi

    Stay Safe on Public Wi-Fi
    A lot of long-distance trails that you can hike solo are located at the other end of the world, which means that you’ll need to travel to get there.
    When traveling, you should always protect yourself when connected to a public Wi-Fi. Always use a VPN to protect your data; the Wi-Fi network won’t be able to steal your passwords and other sensitive information.

    7. Why It’s Safer Than You Think

    Although definitely tempting, do not watch videos on YouTube because you’ll go down a rabbit hole and end up thinking that hiking is more dangerous than it actually is.
    To prove my point, here are some hard facts: in 2019, from 327 million visitors to all US National Parks, only 56 people died from hiking-related deaths.
    That amounts to 0.017 fatalities out of every 100,000 people. Now, let’s compare that to driving, where the fatality rate is 11 per 100,000 people. In simple words, hiking is 647 times safer than driving a car. So do yourself a favor and do not watch videos like that because, in reality, hiking solo is pretty safe.

    8. Avoiding Cliffside Risks

    If you’re a daring person and you’re not afraid of heights, then I would advise you to kind of limit yourself and not go too close to the edges of cliffs. In reality, I’m pretty much talking about me because I used to like to go near the edges and look down. But while I was hiking in Norway,
    Cliffside Risks
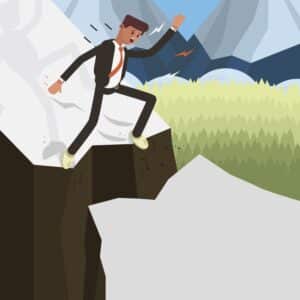
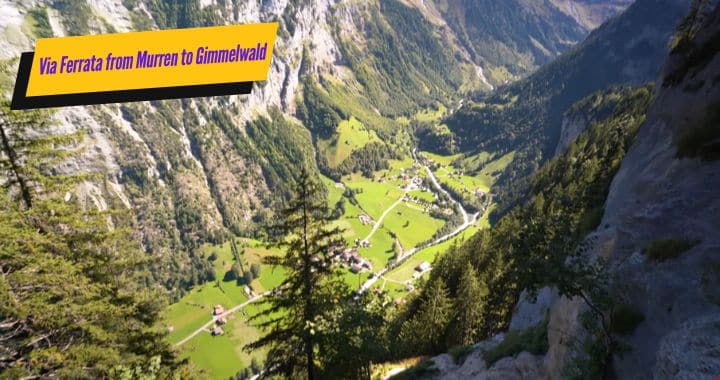
    I approached a cliff that was maybe 50 m high, and then I suddenly lost balance. I don’t know, maybe I stepped on a rock or something, but the point is that I lost my balance right next to the cliff. After that, I started thinking it really takes so little to have an accident like that. So while the experience is still fresh in my mind, now I try not to approach cliffs like that, or at least I try to take off my backpack and then do it much more carefully.

    9. Avoiding Unmarked Shortcuts

    If you see on your phone that you could take a shortcut, but the map shows that there isn’t a trail there, it probably isn’t there for a reason. Especially here in the mountains, eight times out of 10, whenever I take a shortcut in the mountains,
    I end up regretting it because it’s either too overgrown, it’s too steep, or it’s not usable in some other way. Only take it if you can clearly see the whole path and it’s easily doable.

    10. Choosing a Secluded Campsite

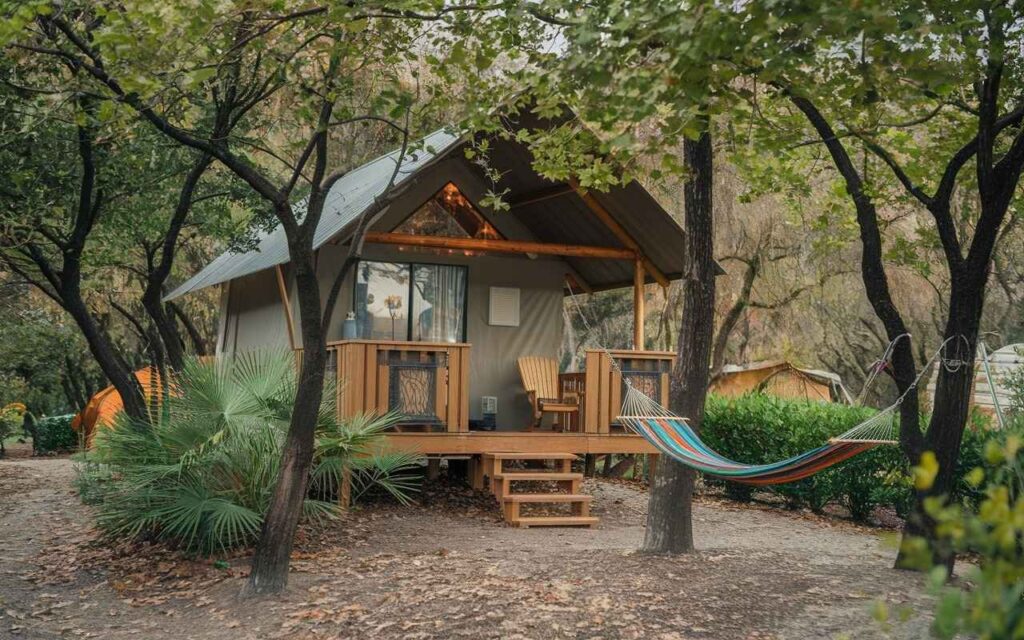
    Most people that do hiking are actually good people, so you don’t realistically need to worry about them. But when you’re camping on public campgrounds, you’re sharing it with other people, which sometimes can be a bit weird or make you feel uncomfortable, or even have some bad intentions. If you’re concerned about that and you’re hiking solo, especially if you’re a girl, it might be a better idea to set up your camp outside of camps, out of sight, not near roads, not near houses, and so on, because nobody will see you there and it will be safer.

    11. Stay Safe on Overgrown Trails

    If you’re hiking on overgrown trails and you can’t really see what’s hiding behind the next Bush 10 to 20 M away, make sure to every once in a while clap your hands and do other loud noises to scare off any wild animals and potentially startling them not only bears. But wild bores deer and other large animals because they might act aggressively when you startle them especially if they’re with their babies.

    12. Avoiding Animal Encounters and Hazards

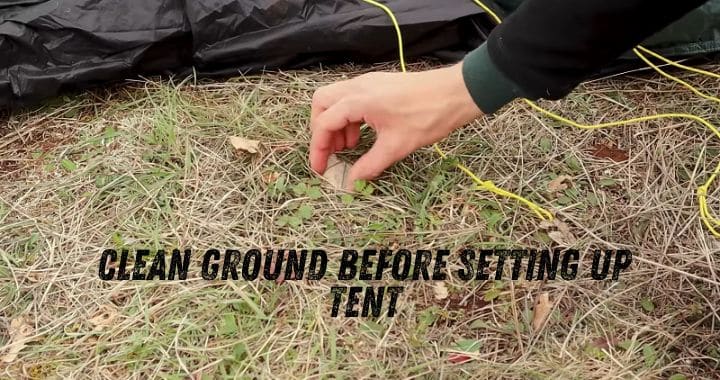
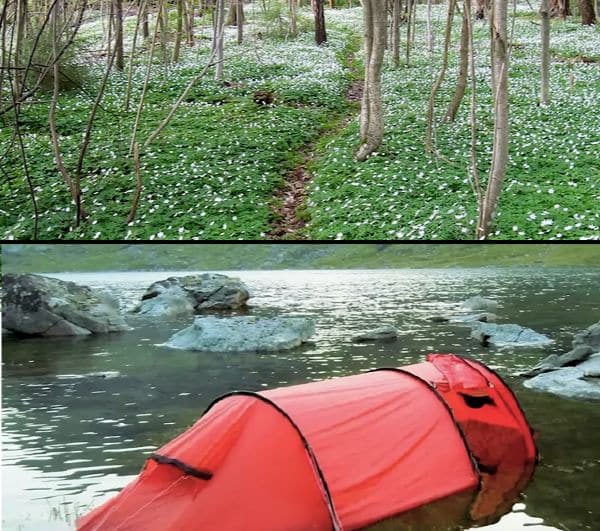
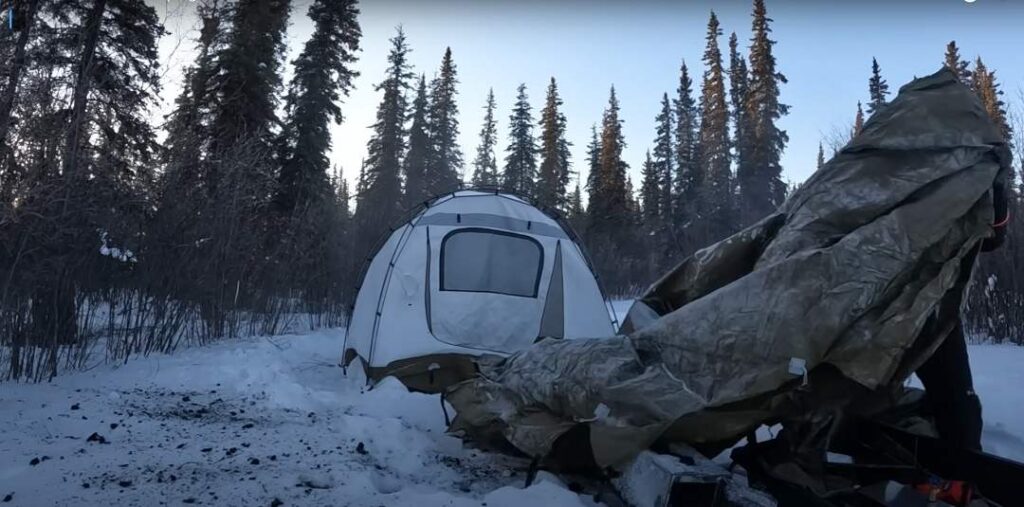
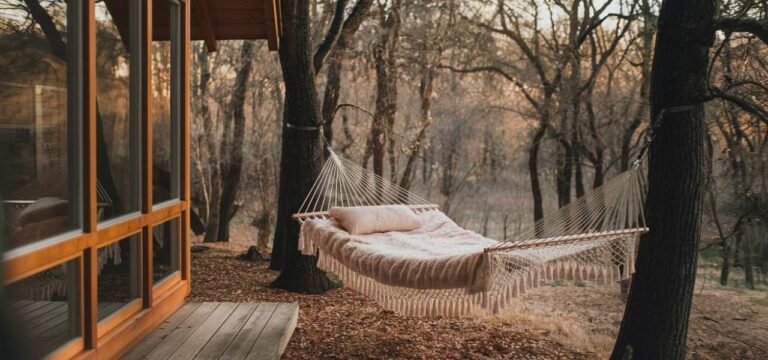
    To avoid animal encounters do not set up your tent near water sources or on animal tracks which essentially look like a regular Trail but less maintained and in the middle of nowhere. Also don’t set it up underneath trees with a lot of dead branches that could fall on the tent or with some dead standing trees nearby and lastly avoid setting up your tent in areas that look like they might flood if a heavy rainstorm kicks in which could be a wash or near a stream or something similar.

    13. Don't Hike If You Are Tired

    Make it a habit to always stop hiking when you start feeling too tired because other than getting a heat stroke or something similar that. When you start to have poor judgment so even if you haven’t reached your desired campsite it’s always a better idea to have a small pause think about where you can set up your tent and possibly even hiking a bit back to set up the tent.

    14. Don't Use Phone While Hiking

    If you’re navigating on your phone, make it a habit to stop and only then look at your phone that’s because you could accidentally step on a rock and sprain your ankle maybe poke your eye with a tree branch step on a snake or something similar.

    15. Start Solo Hiking by Joining Groups or Volunteering

    If you haven’t hiked solo before something that really helps in the beginning is to start hiking in a group first. But the problem that a lot of people have is that their friends usually don’t want to go hiking with them, so what you can do instead is to go on Facebook Groups and look for any hiking groups in your area or you can apply for trail maintenance volunteer jobs in your area because you can find a lot of like-minded people there.
    Start Solo Hiking by Joining Groups or Volunteering

    16. Check Weather and Trail Condition

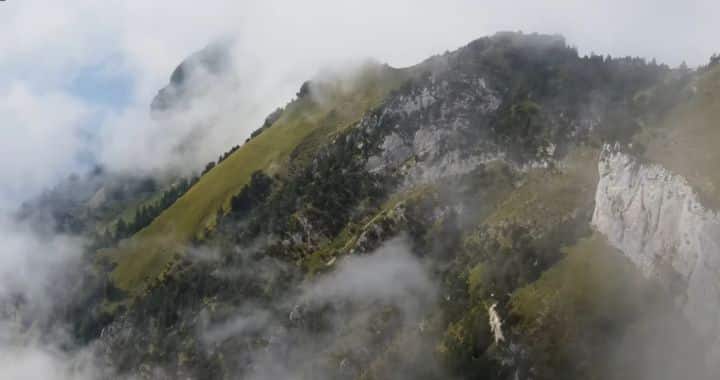
    When hiking solo you need to pay much more attention to the weather forecast and the upcoming trail conditions, because if something happens you’re out on your own avoid hiking in high altitudes late in Spring and even sometimes early in the summer if there’s still a lot of snow left stay below the tree line in thunderstorms and remember that after heavy rains a lot of rivers streams might not be crossable due to a higher water level in the dry season watch out for any Wildfire notices and remember that some water sources might be dried up.

    17. Carry Extra Food

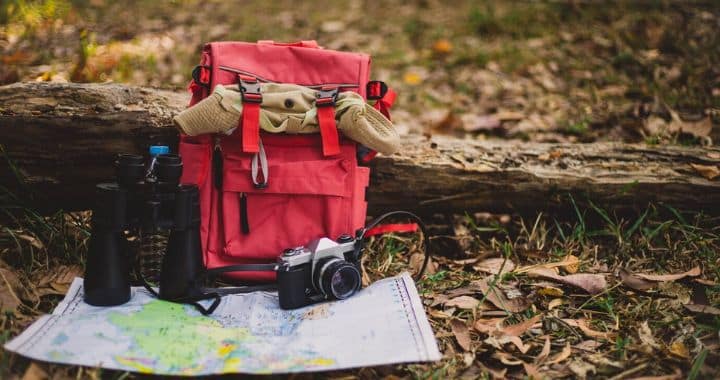
    In case something happens, I usually carry at least one extra day of food with me at all times but if you’re a beginner or if you’re hiking in a very remote area then you should probably carry at least two extra days also do not rely only on food that needs to be cooked on camping stove because you can run out of gas the camping stove might become damaged or if the temperature drops below freezing regular gas powered camping stoves usually stop working then.

    18. Use GPS, Power Bank and Offline Map

    Nowadays, most people navigate using GPS apps on their phone. So here’s what you need to do if you want to do it safely you should always carry a power bank in case your phone runs out
    of charge and you should also make sure that your preferred navigation app also works offline.

    19. Backup Navigation for Solo Hiking

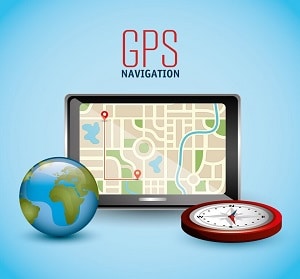
    In areas that aren’t that remote that have well-marked Trails or that you know of personally navigating with just your phone usually is safe enough. That’s like how I navigate 99% of the times but ideally you should also carry a backup as well.
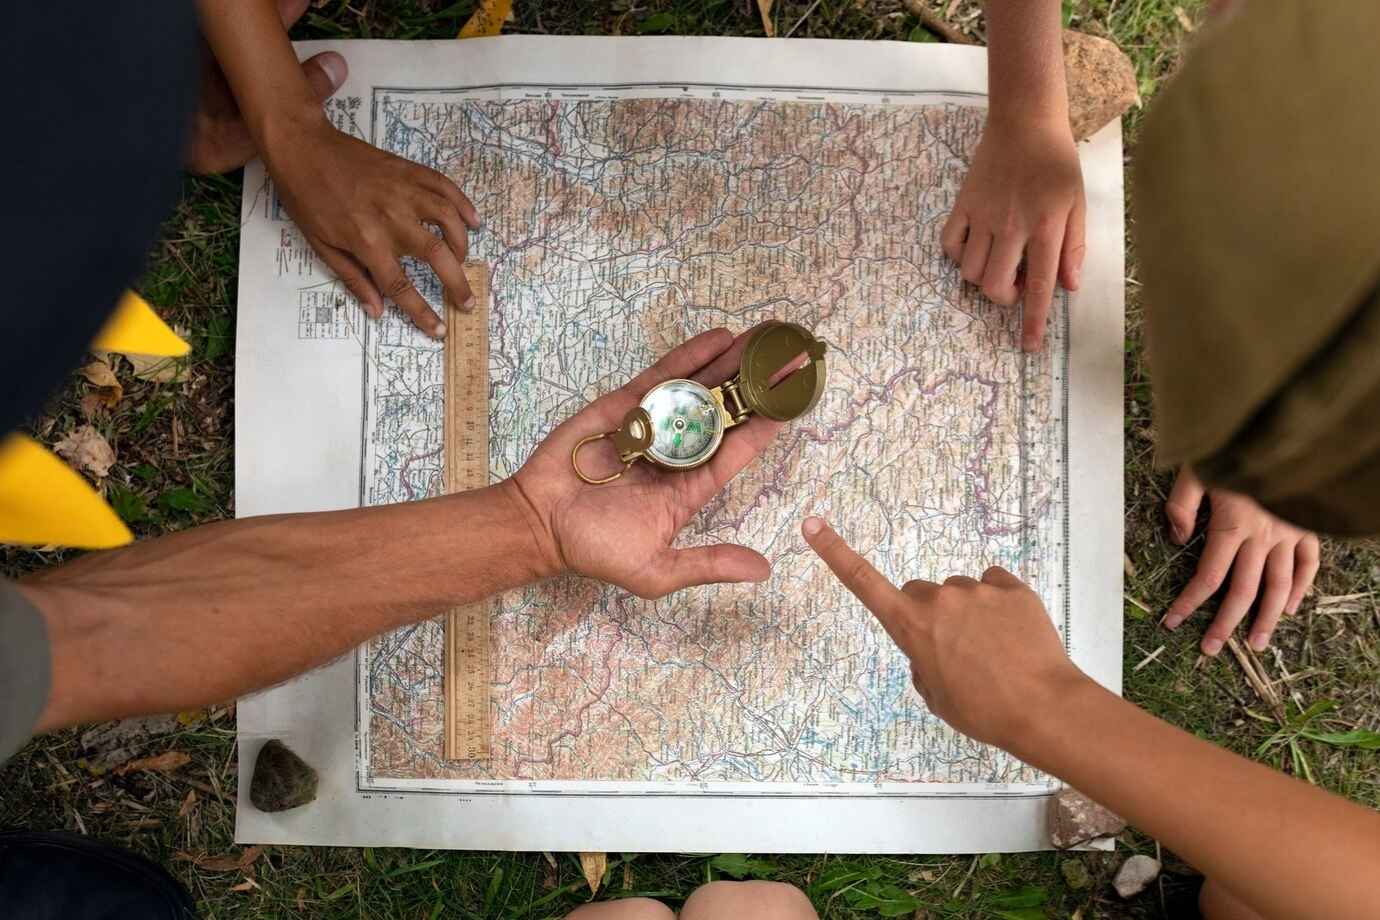
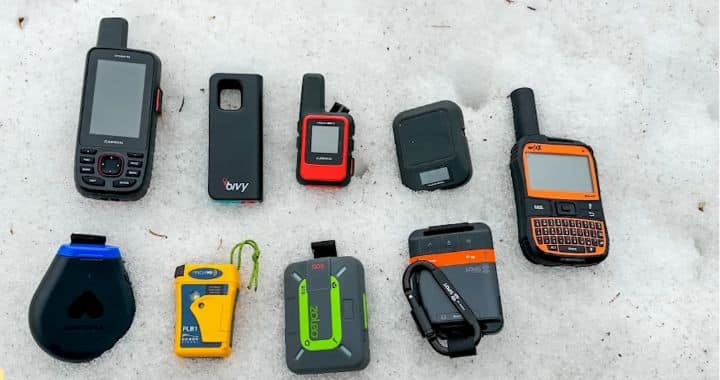
    In case something happens to your phone and the best one definitely is a dedicated GPS device from Garmin Zio spot or something similar that’s because they’re more robust they have a longer battery life, all of them come with an SOS emergency function and a lot of them also come with satellite messaging, which means that you can communicate with other people even if there’s no reception of course another alternative is to carry paper maps and a compass.
    Backup Navigation for Solo Hiking
    As your backup however you have to learn how to use them you have to print a new map before each hike and sometimes they’re also hard to navigate by precisely, especially if you’re hiking in a forest or if there aren’t any key landmarks to navigate by.

    20. Trust Your Instincts: A Key to Safe Solo Hiking

    And the last tip which might actually seem like fluff or BS to some people but in my opinion is quite important is to trust your instincts. We’re all animals and if dogs can sense that something dangerous is about to happen and they become nervous. I think that you subconsciously can do that as well.
    So if your gut is telling you to not Camp here to not hike on that specific Trail or to turn back. I would advise you to follow it of course I don’t have any actual proof to back this up but there are a lot of stories from other people who have trusted their gut while hiking and avoided a potentially dangerous situation.
    9 Best Hikes in Switzerland
    Hiking

    Top 9 Hikes in Switzerland: A Trekker’s Paradise

    Switzerland is a hiker’s paradise, offering everything from towering glaciers to lush meadows, turquoise lakes, and jaw-dropping mountain ridgelines. After spending a considerable amount of time hiking in this beautiful country, it’s safe to say that it might be our favorite hiking destination ever. Whether you’re a seasoned hiker or someone who enjoys a leisurely stroll with incredible views, Switzerland has something for everyone. With options ranging from mountain huts to convenient gondolas and trains that take you straight to the peaks, the hiking experience here is accessible and unforgettable.
    Hikes in Switzerland
    If you’re planning a trip to Switzerland, be sure to check out our comprehensive travel guide. It’s packed with accommodation options, budget tips, transportation advice, camping info, and a ton of activities. It’s an instant download, so you can start planning right away!
    We’ve compiled this list of top hikes in Switzerland, although we must admit—it was impossible to rank them. Every hike is unique, stunning, and hard to compare. We encourage you to pick the hikes that suit your style and fitness level.

    1. Stoos Ridge

    The Stoos Ridge hike offers breathtaking views over Lake Lucerne and is an adventure for the entire family. To reach the top of this ridge, you’ll take the steepest funicular in the world—an experience in itself! Once you’re up, you can choose from a variety of hiking options, including taking a gondola or chairlift to get from point A to point B. The views from the ridge are incredible, especially when the clouds part, giving you a panoramic view of the lake below.
    For those interested in a unique experience, there’s a small goat petting zoo on the way, which will definitely add to the fun. If you’d like, you can even stay overnight at the mountain restaurant, where the views over the lake are second to none.

    2. Via Ferrata from Murren to Gimmelwald

    For those who enjoy a challenge and a bit of adrenaline, the Via Ferrata from Murren to Gimmelwald is a must-do. This route is not for the faint of heart as it involves traversing narrow ridgelines and steep cliffs. You’re secured to the mountain with a harness and clips attached to cables anchored into the rock, which provides a sense of security despite the scary heights. The adrenaline rush is worth it, though.
    This hike doesn’t require a tour guide, but it’s a good idea to have prior Via Ferrata experience. Gear can be rented in Murren for a reasonable price, and you’ll be well-prepared for the thrilling journey ahead. If you’re up for the challenge, this hike will provide you with one of the most exciting experiences Switzerland has to offer.

    3. Gorner Glacier

    The Gorner Glacier in Zermatt is a popular spot for hiking and offers one of the most dramatic glacier views in Switzerland. For those up for a 20-kilometer hike with a 1500-meter elevation gain, this is a great option. If you prefer something a bit easier, you can opt for the Gornergrat Bahn, a scenic train ride that takes you directly to a viewpoint overlooking the glacier. The train ride costs about 110 Swiss Francs, which might not be the most budget-friendly option, but it’s worth it for the stunning views.
    Once you reach the top, a series of switchbacks lead you closer to the glacier. There’s also an option to loop around and explore other parts of the glacier, making for a well-rounded and unforgettable experience. This hike can be combined with other routes to customize the level of difficulty.

    4. Muttseehutte

    Muttseehutte offers one of the most unique hiking experiences in Switzerland. It’s a longer hike, around 11.4 kilometers, with 600 meters of elevation gain. The hike starts with a gondola ride, which takes you up to a tunnel that you’ll walk through for the first part of the hike. This offers some shelter if you’re hiking in chilly weather.
    Muttseehutte
    After exiting the tunnel, the hike steepens as you climb toward the Muttseehutte. The view is absolutely worth the effort, especially when you get to the top and can take in the majestic surroundings. For those interested in spending the night, the mountain hut offers private rooms with a cozy atmosphere. The price for staying is very reasonable, considering the incredible experience and the delicious meals served.

    5. Schafler Ridge and Seealpsee

    Schafler Ridge and Seealpsee are two separate hikes that are best combined to get the most out of the experience. There are plenty of gondola rides in Switzerland to help you gain elevation quickly, and this hike starts with a thrilling seven-minute gondola ride that takes you up over 1,000 meters. From there, you can enjoy a scenic hike along the ridge, staying overnight at the Schafler Hut.
    Schafler Ridge and Seealpsee
    The views from the hut are magnificent, especially during sunrise and sunset when the light casts beautiful colors on the peaks. After your stay, you can complete the loop down to Seealpsee, a stunning emerald-green lake nestled in a Swiss meadow. This hike covers 13.6 kilometers and offers about 585 meters of elevation gain, making it a moderately challenging but rewarding adventure.

    6. Augstmatthorn

    Augstmatthorn is one of the most well-known hikes in the Interlaken region, offering panoramic views of both lakes and the town of Interlaken. You can take a gondola up to the starting point, which helps save energy for the actual hike. The route is relatively short—about 5 kilometers—but it’s well worth the effort for the spectacular views at the top. Here is te full video you can watch all 9 hikes in Switzerland.
    If you’re lucky, you might also spot some local wildlife, such as marmots or ibex, which are common in the area. The hike is ideal for those who want to experience Switzerland’s beauty without committing to a long or strenuous trek.

    7. Aletsch Glacier

    The Aletsch Glacier, the longest glacier in the Alps, is a must-see for anyone visiting Switzerland. At 23 kilometers long, it’s a truly breathtaking sight. The hike along the side of the glacier offers stunning views, and you can opt to take a gondola to gain some elevation before heading out on your hike.
    The hike itself is about 8 kilometers long, and the views along the way are nothing short of incredible. You can loop the hike for a complete experience or mix it up with other trails in the area. If you’re into glaciers, this one should be on your list of must-see destinations.

    8. Oeschinensee Lake

    Oeschinensee Lake is one of Switzerland’s most photographed and most visited destinations—and for good reason. The hike to the lake is absolutely gorgeous, with lush meadows, alpine forests, and majestic mountain views. The gondola ride up to the lake is well worth the investment, as it saves you the steep climb.
    Oeschinensee Lake
    Once you reach the lake, you can enjoy activities like boating or swimming. The water is incredibly clear, and the surrounding scenery is out of this world. You can also take a hike around the lake or up the ridges for panoramic views. This is one of those hikes that will leave you feeling awe-struck.

    9. Stellisee Lake

    Topping our list is the hike to Stellisee Lake, with its perfect views of the Matterhorn. This is arguably the most iconic photo spot in Switzerland, and for good reason—it’s absolutely breathtaking. The hike is relatively short, but the views are nothing short of spectacular, especially during sunrise when the light paints the mountains in golden hues.
    The best way to experience this hike is to stay overnight at the nearby hut. You’ll have prime access to Stellisee Lake at sunrise and sunset, and the photos you’ll take here will be memories you cherish forever. This hike, combined with a trip to the Gorner Glacier, offers the perfect way to experience the best of the Swiss Alps.

    Final Thoughts

    Switzerland is full of incredible hiking experiences, with breathtaking views, challenging hikes, and cozy mountain huts to make your trip even more memorable. Whether you’re an experienced hiker or a beginner, these top hikes offer something for everyone. Don’t forget to check out our Switzerland travel guide for all the information you need to plan the perfect hiking adventure in this stunning country!
    Best hiking socks of 2024-25
    Uncategorized

    Best hiking socks of 2024-25

    Your feet deserve better. Trust me—nothing ruins a hike faster than sore feet or unexpected blisters. As someone who’s spent countless hours on the trail, I’ve learned the hard way that great hiking socks are just as important as sturdy boots. They don’t just keep your feet warm; they cushion every step, wick away sweat, and make those long treks feel a little less grueling. With 2024-25 bringing new innovations in sock design, it’s the perfect time to upgrade. From breathable summer socks to cozy winter pairs built for snowy adventures, this guide has you covered. Let’s find the perfect hiking socks to keep your feet happy, no matter where the trail leads.
    hiking socks

    My Top Picks for Men’s and Women’s Hiking Socks

    Best hiking socks for women

    As someone who hikes with friends who swear by women-specific socks, I’ve seen how much difference the right fit makes. Women’s hiking socks are designed for a snug, supportive feel, with extra arch support and soft materials that reduce friction. The focus on comfort and breathability makes those long treks way more enjoyable. Plus, no one wants blisters ruining a perfect trail day, right?

    Top Picks (Based on Real Hiker Favorites):

    1. Balega Blister Resist Crew My Balega’s Blister Resist socks are consistently praised for their outstanding durability, comfort, and blister-preventing performance.
    Whether it’s a grueling hike, a long run, or just everyday use, these socks deliver on their promise, keeping feet dry, cushioned, and supported for hundreds of miles. From seasoned hikers to casual runners, users rave about the snug fit, superior cushioning, and the remarkable ability to stay blister-free, making them a must-have for anyone serious about foot comfort.
    2. Farm to Feet Damascus Lightweight Crew These socks are widely loved for their exceptional comfort, durability, and ability to keep feet dry and odor-free, even during long hours of use.
    Whether worn by firefighters during 24-hour shifts, backpackers on rigorous trails, or hunters in varying weather, they offer superior fit, cushioning, and temperature regulation. Made in the USA with high-quality materials, these socks are appreciated for their long-lasting performance, blister prevention, and thoughtful design, though some users note sizing preferences and minor color variations.
    3. Icebreaker Hike+ Light Crew – I’ve heard nothing but praise for these. Soft merino wool, breathable, and they never seem to hold odors—perfect for longer hikes.
    Icebreaker Hike+ Light Crew

    Best hiking socks for men

    Let me tell you, I’ve hiked in everything from smooth trails to rocky terrain, and one thing I’ve learned is that men’s hiking socks need to be tough. Guys often carry heavier packs or tackle more rugged paths, so durability is non-negotiable. Reinforced heels, thick cushioning, and moisture-wicking fabrics like merino wool are game-changers. A good pair of socks should feel like armor for your feet—protective but still comfortable.

    Top Picks (Tried and True):

    1. Darn Tough Hiker Micro Crew Cushion: Darn Tough socks are highly praised for their exceptional comfort, durability, and lifetime warranty. Reviewers appreciate the superior build quality, cushioned support,
    and effective moisture management, making them ideal for various activities like hiking and daily wear. Despite the higher price, customers find them worth the investment due to their long-lasting performance and the added value of being made in the USA.
    2. Smartwool Performance Hike Crew I love how they regulate temperature, especially when I’m hiking through unpredictable weather.
    Smartwool Performance Hike Crew
    3. Injinji Trail Midweight Crew Blisters used to be my worst enemy, but these toe socks solved that problem. Perfect for long, grueling hikes.
    Injinji Trail Midweight Crew
    Whether you’re hitting the trail solo or with friends, picking the right socks makes all the difference. I’ve seen firsthand how good socks can turn a grueling hike into an unforgettable adventure. Trust me, your feet will thank you!

    A Seasonal Guide to Choosing Great Hiking Socks

    Over the years, I’ve learned that the right socks can make all the difference, especially when the weather takes a turn. Whether you’re sweating it out under the summer sun or trudging through deep snow, choosing the right pair for the season is key to keeping your feet happy. Let’s break down the best hiking socks for every type of weather.

    Hiking Socks for Summer

    Summer hikes can be brutal on your feet—sweaty, hot, and uncomfortable if you don’t have the right gear. I remember one sweltering hike where I wore thick socks, and it felt like walking in a sauna. Never again! Lightweight, breathable socks are the way to go in summer. Look for moisture-wicking materials like merino wool blends or synthetic fabrics that keep your feet cool and dry.

    Top Picks:

    1. Smartwool PhD Outdoor Light Crew – These keep my feet cool and dry even on the hottest days.
    Smartwool PhD Outdoor Light Crew
    Darn Tough Vertex Ultra-Light Cushion
    2. Darn Tough Vertex Ultra-Light Cushion –Thin but tough, perfect for those long summer hikes.

    Hiking Socks for Winter

    Winter hikes bring a whole new set of challenges—cold toes being the worst. I’ll never forget a winter hike where I underestimated the cold and my feet were numb within an hour. Lesson learned! You need thick, insulated socks that trap heat while still allowing your feet to breathe. Merino wool is a lifesaver for this season, providing warmth without overheating.

    Top Picks:

    • Icebreaker Mountaineer Mid-Calf Sock 
      Warm and soft, they’ve kept my feet toasty during sub-zero hikes.
    Smartwool Performance Hike Crew
    • Smartwool Trekking Heavy Crew
      These are thick and cushioned, perfect for keeping my feet warm on long winter treks.

    Hiking Socks for Snow

    Hiking in snow demands even more from your socks. You’ll need something extra warm, moisture-resistant, and tall enough to keep snow out. I learned this the hard way when snow snuck into my socks during a snowy mountain hike. The right pair can prevent that icy misery and keep you focused on the beauty around you.

    Top Picks:

  • Bridgedale Explorer Heavyweight Sock –Thick, tall, and built for snowy conditions.
  • SealSkinz Waterproof Cold Weather Socks – These are my go-to for snowy hikes—waterproof and incredibly warm.
  • Essential Factors to Look for in Hiking Socks

    Over time, I’ve come to realize that not all hiking socks are created equal. The difference between a good hike and a great one often comes down to the small details—like the socks on your feet. Here are the key features I always look for when choosing hiking socks:
    Over time, I’ve come to realize that not all hiking socks are created equal. The difference between a good hike and a great one often comes down to the small details—like the socks on your feet. Here are the key features I always look for when choosing hiking socks:

    My Recommendations

    Here’s a quick recap of my top picks for 2024-25:

    For Men

    Darn Tough Vertex Ultra-Light Cushion
    Darn Tough Vertex Ultra-Light Cushion

    For Women

    Smartwool Performance Hike Crew
    a pair of socks with a design on them

    Best for Summer

    Smartwool PhD Outdoor Light Crew
    Smartwool PhD Outdoor Light Crew

    Best for Winter

    Icebreaker Mountaineer Mid-Calf Sock
    Invest in a few great pairs, and trust me, your feet will thank you. Happy hiking!

    FAQs

    It depends on how often you hike and the quality of your socks. On average, I replace mine every 6-12 months or when they lose cushioning, develop holes, or feel less supportive. High-quality socks like Darn Tough or Smartwool tend to last longer.
    No way! Cotton traps moisture and doesn’t dry quickly, which can lead to blisters. Stick to merino wool or synthetic blends for moisture control and comfort. Trust me, I learned this the hard way!
    Absolutely. I used to think any socks would do, but investing in quality pairs made a world of difference. They last longer, keep your feet dry, and offer better support, which ultimately saves you money in the long run.
    It depends. Some people swear by it, but I prefer single-layer socks with seamless construction. If you go for two layers, make sure the inner sock is thin and moisture-wicking.

    Final Thought

    After years of hiking in all kinds of conditions, I can confidently say that good hiking socks are a game-changer. They’ve saved me from blisters, cold toes, and sweaty discomfort more times than I can count. Whether you’re braving snowy trails or enjoying a summer day hike, the right pair will elevate your adventure. Don’t overlook the power of comfortable feet—you’ll be amazed at how much more enjoyable the trail becomes.
    If you’re gearing up for your next adventure, don’t forget that the right socks are only part of the equation. Pair them with the perfect hiking outfit to stay comfortable and stylish on the trail. For inspiration, check out my blog on 7 Best Hiking Pants for Women and discover what to wear for different conditions in Hiking Outfits: What to Wear for Every Season and Adventure. Together, the right gear ensures every hike is one to remember—blister-free and full of joy. Happy hiking!
    Camping in December 2024
    Camping

    Camping in December 2024: A Magical Winter Adventure

    There’s something uniquely special about camping in December. The crisp, cool air, the tranquility of nature’s winter slumber, and the cozy warmth of a campfire create an unforgettable experience. Unlike the bustling summer months, December camping offers a more peaceful and intimate escape. I’ve always felt that December has a magic of its own—maybe it’s the way the world seems quieter, Or maybe it’s the pure delight of bundling up in cozy layers and gazing at the stars as they shimmer in the crisp, cold night sky.
    Camping in December

    Why December Camping is Worth It

    There’s something about waking up to frost-kissed landscapes or, if you’re lucky, a light dusting of snow. The world feels different—calmer, more serene. It’s not just about escaping the holiday rush (although that’s a bonus); it’s about reconnecting with nature in its rawest, most peaceful form. One December, I experienced camping in December in the mountains, and the silence was almost overwhelming in the best way. There was no hum of distant cars, no chatter from fellow campers—just the crackle of the fire and the whisper of the wind through the trees. For me, December camping is also about simplicity. It removes the noise and distractions of modern life. There’s no Wi-Fi, no notifications—just you, nature, and the people you’re with. The short days mean you spend more time around the campfire, sharing stories, sipping hot drinks, and watching the flames dance. Those are the moments I remember most.

    Best Places to Camping in December

    1. Joshua Tree National Park, California

    Joshua Tree National Park, California for camping in december
    If you’re looking to escape the chill of winter but still want an unforgettable camping experience, Joshua Tree is a fantastic option. The desert landscape in December is breathtaking, with cooler temperatures making it perfect for daytime hikes. I camped there once, and the memory of the Milky Way stretching across the sky is something I’ll never forget. The lack of light pollution makes it one of the best places for stargazing.

    2. Great Smoky Mountains, Tennessee/North Carolina

    During camping in december, you will enjoy the Smoky Mountains transform into a winter wonderland. Imagine waking up to misty mountains and frost-covered trees. It’s the perfect spot to completely relax and recharge. While I haven’t camped here in December yet, it’s high on my list. The peacefulness of the Smokies during the off-season is something I can’t wait to experience.

    3. Big Bend National Park, Texas

    Big Bend offers a desert camping experience that’s perfect for December. The days are comfortably mild, while the nights bring a cool chill without being too harsh. I’ve read stories of campers waking up to stunning sunrises over the rugged landscape, and it’s a place I’m eager to explore. Additionally, the park’s secluded setting offers some of the best stargazing opportunities you’ll find.

    4. Zion National Park, Utah

    Experiencing Zion in December is like stepping into a vibrant, living painting. The red rock cliffs, lightly dusted with snow, create a breathtaking contrast against the clear winter sky. While it can get cold, the beauty of the park during the winter months makes it worth it. I’ve always dreamed of hiking Angels Landing in the crisp winter air, with fewer crowds to contend with.

    5. Everglades National Park, Florida

    If you’re looking for a warmer destination, the Everglades are ideal. December is one of the best times to visit because the weather is mild, and the mosquito population is low. Camping in december offers a completely different experience from the mountains or deserts. I’m excited to one day explore the unique ecosystem of mangroves, wetlands, and wildlife.

    Packing Essentials for December Camping

    Camping in december requires a bit more preparation, but with the right gear, it’s a comfortable and enjoyable experience. Here’s what I always pack:
    Essentials for December Camping

    1. Four-Season Tent

    A four-season tent is crucial for ensuring warmth and shelter from the harsh winter elements. Even if you’re camping somewhere relatively mild, it’s worth investing in a tent that can handle colder temperatures.

    2. Insulated Sleeping Bag

    Ensure your sleeping bag is suitable for the temperatures you’ll encounter during your trip. I use a sleeping bag rated for at least 20°F, and I also bring a sleeping bag liner for extra warmth.

    3. Sleeping Pad

    A quality sleeping pad offers essential insulation from the chilly ground. It’s surprising how much heat you can lose without one, so don’t skimp on this piece of gear.

    4. Layered Clothing

    Layers are your best friend. I always pack thermal base layers, a warm fleece or down jacket, and waterproof outer layers. Make sure to keep a hat, gloves, and warm socks to stay cozy.

    5. Cooking Gear and Food

    A camp stove is a must for winter camping since not all areas allow fires, and you’ll want something reliable for boiling water and cooking. Bring easy-to-make, hearty meals like soups, stews, and oatmeal.
    Cooking Gear and Food

    6. Hot Drinks

    There’s nothing better than a hot cup of cocoa, coffee, or tea on a cold December morning. I always pack plenty of hot drink options to keep me warm and energized. Tips for Staying Warm
    • Stay Dry: Wet clothes can quickly sap your body heat, so pack waterproof gear and change out of damp clothes immediately.
    • Use a Hot Water Bottle: Before bed, I fill a water bottle with hot water and stick it in my sleeping bag. It keeps me warm all night.
    • Layer Smartly: Start with moisture-wicking base layers, add insulating layers, and top it off with a waterproof shell.

    FAQs

    Yes! Camping in December is an excellent time to camp if you’re looking for peace, quiet, and unique winter landscapes. With fewer crowds and cooler temperatures, it’s a great time to explore nature.

    Some of the best places include Joshua Tree, the Smoky Mountains, Big Bend, Zion, and the Everglades. Each offers a different experience, from desert landscapes to snowy mountain vistas.

    Pack a four-season tent, insulated sleeping bag, sleeping pad, layered clothing, cooking gear, and plenty of food and hot drinks. Don’t forget a headlamp or flashlight, too!

    Layer your clothing, use an insulated sleeping pad, and keep a hot water bottle in your sleeping bag. Staying dry is key, so pack waterproof gear and extra clothes.

    Yes, but it requires preparation. Make sure you have the right gear, including a tent designed for winter conditions, a sleeping bag rated for low temperatures, and waterproof clothing.

    Final Thoughts

    Camping in December offers a chance to experience nature in a completely different way. Whether you’re drawn to snowy mountains or mild desert landscapes, the serenity and beauty of winter camping are unmatched. For me, it’s the perfect way to end the year—surrounded by nature, away from the noise, and soaking in the quiet magic of the season. So pack your gear, pick a spot, and embrace the adventure. You won’t regret it.
    Cabin Camping
    Camping

    Cabin Camping in Texas 2025: A Cozy Adventure Awaits

    Cabin Camping
    Texas, with its vast landscapes and endless opportunities for exploration, is a prime destination for cabin camping. Whether it’s the rolling hills of the Hill Country, tranquil pine forests, or serene lakeside retreats, cabin camping provides a perfect balance of comfort and immersion in nature. For 2025, make plans to experience the charm of cabin camping in Texas—it’s a choice that promises unforgettable memories. As someone who’s spent many nights under the stars and in cozy cabins, I can confidently say this: there’s nothing quite like waking up to the sounds of nature, enjoying a coffee on a rustic porch, and spending the day immersed in the great outdoors. Let’s dive into the best spots and experiences to inspire your next adventure.

    The Magic of Cabin Camping in Texas

    Texas boasts an incredible range of cabin camping experiences, catering to every kind of adventurer. You can opt for a rustic cabin that puts you close to nature or go all-in on a luxury option with modern amenities. Cabin camping is ideal for families, solo travelers, and couples alike, as it combines the serenity of nature with the comforts of home. Unlike tent camping, cabin camping provides shelter from the elements, making it a year-round option. Rain or shine, you’ll stay dry and cozy while still having access to stunning landscapes, hiking trails, and the sense of adventure that makes camping so special.

    Family Cabin Camping in Texas

    Growing up, I spent countless weekends with my family exploring Texas parks and staying in cabins. Those trips were where I first discovered my love for nature. Family cabin camping in Texas is all about creating shared experiences: hiking through forests, fishing in serene lakes, and sitting around a campfire telling stories.

    Top Picks for Families

    Located in the Hill Country, this park is a dream for families. The cabins are spacious and close to activities like swimming, kayaking, and hiking. Kids will love exploring the Devil’s Waterhole, a natural swimming hole with scenic views.
    Perfect for families with young kids, this park offers cabins near a tranquil lake. Spend the day fishing, paddle boating, or biking along the trails. The serene setting makes it easy to unplug and connect with each other.
    This East Texas gem has cabins surrounded by towering pines. It’s a great spot for boating, birdwatching, and enjoying the peaceful atmosphere of one of the largest lakes in Texas.
    Inks Lake State Park

    Best Cabin Camping in Texas

    Texas never fails to impress when it comes to cabin camping. From the rugged beauty of West Texas to the lush greenery of the Hill Country, there’s no shortage of breathtaking locations. Here are my personal favorites, each offering something unique.

    Garner State Park

    Set along the Frio River in the heart of the Hill Country, Garner State Park is one of the best places to camp in Texas with cabins. The park is known for its stunning scenery, crystal-clear water, and family-friendly atmosphere. I stayed here last summer and spent my mornings hiking and evenings grilling outside the cabin while watching the sun dip behind the hills.

    Palo Duro Canyon State Park

    Known as the “Grand Canyon of Texas,” Palo Duro Canyon offers cabins with stunning views of its rugged red-rock formations. The park is perfect for hiking, mountain biking, or simply soaking in the dramatic scenery. Experiencing the sunrise over the canyon is a moment that stays etched in your heart forever.

    Caddo Lake State Park

    For a more serene and mystical experience, head to Caddo Lake. The cabins are nestled among towering cypress trees draped in Spanish moss. Exploring the bayous by kayak or canoe feels like stepping into another world.

    Cabin Camping in Texas Hill Country

    The Hill Country has always been a region that feels deeply personal and inspiring to me. It’s where I first truly fell in love with the outdoors. The rolling hills, crystal-clear rivers, and vibrant wildflowers make it one of the most picturesque regions in Texas. Cabin camping in the Hill Country allows you to experience all of this in comfort.

    Top Hill Country Spots

  • Pedernales Falls State Park This park offers cozy cabins near the Pedernales River. Spend your days hiking trails that wind through rocky terrain or swimming in the river’s natural pools.
  • Blanco State Park If you’re looking for a quieter spot, Blanco State Park is a hidden gem. The cabins here are close to the Blanco River, where you can fish, swim, or just relax by the water.
  • Hill Country State Natural Area For those who love peace and solitude, this remote area is a dream. The cabins are rustic, but the views and starry skies more than make up for it.
  • Top Destinations for Cabin Camping in Texas

    If you’re still deciding where to go, here’s a roundup of some of the best places to camp in Texas with cabins. Each offers a unique experience, whether you’re after adventure, relaxation, or a mix of both.

    • Big Bend National Park

    For the adventurous at heart, Big Bend is unbeatable. While most visitors camp in tents, nearby cabin rentals offer a more comfortable way to explore this rugged desert landscape.

    • Davis Mountains State Park

    Located in West Texas, this park offers cooler temperatures and stunning mountain views. The cabins here are ideal for those looking to escape the summer heat.

    • Lake Texoma

    This massive lake straddles the Texas-Oklahoma border and is a hotspot for water activities. The cabins here are perfect for fishing enthusiasts or families who love being on the water.

    What to Expect from Cabin Camping

    Comfort Meets Nature

    Most cabins in Texas state parks are equipped with basic amenities, including beds, air conditioning, and electricity. Some even have kitchens and bathrooms, while others offer more rustic setups with shared facilities.

    Activities Galore

    Staying in a cabin places you right in the heart of nature, ensuring there’s always something exciting to explore and enjoy. Whether it’s hiking, fishing, birdwatching, or stargazing, there’s an activity for everyone to enjoy and connect with nature.

    A Chance to Disconnect

    One of my favorite things about cabin camping is the chance to unplug. Many parks have limited cell service, forcing you to focus on the beauty around you and the people you’re with.

    A Personal Cabin Camping Story

    I’ll never forget my trip to Garner State Park a few years ago. It was late spring, and the Hill Country was alive with wildflowers. I arrived just before sunset, and the golden light on the Frio River was breathtaking. That evening, I grilled burgers outside the cabin while listening to the gentle rustling of the trees. The cabin was charmingly simple yet cozy, providing all the essentials for a comfortable and relaxing stay. The next day, I woke up early and hit the trails, enjoying the cool morning air and stunning views. By the afternoon, I found myself gently drifting down the river, basking in the warm glow of the sun. It was the perfect mix of adventure and relaxation, and it’s a trip I often think back on when I need a dose of inspiration.

    Why Cabin Camping in Texas Should Be on Your 2025 Bucket List

    There’s no better way to experience the Lone Star State than through cabin camping. Whether you’re exploring the dramatic landscapes of West Texas, the lush forests of East Texas, or the charming Hill Country, you’ll find a cabin that feels like home. Set aside some time to plan your adventure, pack your essentials, and prepare to create unforgettable memories that will stay with you for years to come. With its incredible diversity and endless opportunities for adventure, Texas truly has something for everyone. Happy camping, and I hope to see you out there on the trails—or maybe by a cozy cabin fire! 🌟
    Best Camp Dinners
    Camping

    Top 10 Best Camp Dinners: Delicious Meals to Savor Under the Stars

    Camping is more than just exploring new trails or setting up the perfect tent—it’s about making memories, and one of the best ways to do that is through food. After a day of adventure, there’s nothing more satisfying than sitting by the fire and enjoying a delicious, home-cooked meal in the heart of nature. Over the years, my partner and I have perfected the art of camp cooking, turning simple ingredients into unforgettable meals. Whether you’re camping in a serene forest or by the beach, these top 10 camp dinners will make your evenings as magical as the stars above.
    Best Camp Dinners Delicious Meals to Savor Under the Stars

    1. Classic Campfire Chili

    A steaming bowl of chili is the quintessential camp dinner. Made with ground beef (or a vegetarian alternative), beans, tomatoes, and spices, this one-pot dish is filling, flavorful, and perfect for chilly nights.

    Why It Works

    It’s easy to make in a Dutch oven or large pot over the fire. Plus, it’s even better the next day as the flavors deepen.

    Pro Tip:

    We often prep the ingredients at home to save time. Top it off with a generous spoonful of sour cream and a sprinkle of shredded cheese for a creamy, flavorful finish!

    2. Foil Packet Tacos

    Who doesn’t love tacos? Pre-fill foil packets with seasoned ground meat, black beans, diced onions, and peppers. Let them cook over the fire, then serve with tortillas and your favorite toppings.

    Why It Works

    It’s customizable! My partner enjoys adding extra cheese and jalapeños, while I load up on guacamole and salsa.
    Foil Packet Tacos for camp dinner

    3. Grilled Veggie and Sausage Skewers

    Skewers are a no-fuss, delicious dinner option. Alternate pieces of sausage, zucchini, cherry tomatoes, bell peppers, and mushrooms on skewers and grill over hot coals.

    What Makes It Special

    The smoky, charred flavor from the fire pairs perfectly with the natural sweetness of the veggies.

    Personal Touch

    We like to make this meal interactive—prepping and grilling the skewers together adds to the fun!

    4. Campfire Pizza

    Pizza in the wilderness? Absolutely! Use pre-made pizza dough or flatbread, spread marinara sauce, and pile on your favorite toppings. Cook it in a cast-iron skillet over the fire until the cheese melts and the crust crisps up.

    Our Favorite Toppings

    My partner loves pepperoni and extra cheese, while I go for a veggie medley with spinach, olives, and mushrooms.

    5. Dutch Oven Lasagna

    When you’re craving comfort food, lasagna cooked in a Dutch oven is a game-changer. Layer pasta, marinara sauce, ricotta cheese, mozzarella, and ground beef, then let it bake over the fire.

    Why It’s Worth It

    The gooey cheese and rich flavors make this dish a camping luxury. We reserve this for special nights when we want to celebrate a milestone or just indulge.

    6. Stir-Fried Noodles

    Simple, quick, and satisfying, stir-fried noodles are perfect for campers. Toss pre-cooked noodles with veggies, soy sauce, and your choice of protein in a skillet.

    Flavor Boost

    We like to add a splash of sesame oil and sprinkle sesame seeds on top for a nutty kick.

    7. Campfire Nachos

    Nachos are perfect for sharing. Layer tortilla chips, shredded cheese, beans, diced tomatoes, and jalapeños in a cast-iron skillet or foil pan. Cover with foil and heat until the cheese melts.

    Why We Can’t Resist

    It’s a snack that doubles as dinner. Plus, it’s fun to share a big skillet of nachos while reminiscing about the day’s adventures.
    Campfire Nachos

    8. Burgers and Sweet Potato Fries

    Burgers are a camping classic. Grill patties (beef, chicken, or veggie) over the fire and pair them with sweet potato fries cooked in foil packets.

    Our Twist

    We add avocado slices, a fried egg, or spicy mayo to our burgers for an extra layer of flavor.

    9. Stuffed Bell Peppers

    Stuffed bell peppers are not only healthy but also visually stunning. Hollow out bell peppers and fill them with a mix of cooked rice, beans, ground meat, and spices. Seal it in foil and let it sizzle right on the hot embers for a smoky, charred flavor.

    Why It’s a Favorite

    Watching the peppers char over the fire while holding hands makes this meal special.

    10. Campfire Mac and Cheese

    Nothing beats the cozy, creamy goodness of mac and cheese, especially after a long day outdoors. Pre-cook pasta at home and mix it with a creamy cheese sauce. Heat it up in a cast-iron skillet over the fire.

    Extra Touch

    We like to sprinkle crumbled bacon or breadcrumbs on top for added texture.
    Campfire Mac and Cheese

    Tips for a Smooth Camp Dinner Experience

  • Plan Ahead: Prepping ingredients at home for your camp dinner saves time and reduces stress. Chop veggies, marinate proteins, and pack dry ingredients in zip-lock bags.
  • Invest in the Right Gear: A cast-iron skillet, a Dutch oven, and a good set of utensils can make a world of difference when preparing the perfect camp dinner.
  • Don’t Forget the Condiments: Salt, pepper, hot sauce, and olive oil are essential for enhancing the flavors of your camp dinner.
  • Cook Together: Preparing meals as a team makes the experience more enjoyable and strengthens your bond, making each camp dinner even more special.
  • Personal Reflections

    As a couple who loves camping, we’ve realized that cooking a camp dinner together is as rewarding as exploring a new trail or setting up the perfect campsite. Some of our favorite memories are tied to these camp dinners—whether it’s the smell of lasagna baking in a Dutch oven or the sight of melted cheese dripping off a freshly grilled skewer. Camping meals aren’t just about sustenance; they’re about connection. They’re about pausing to appreciate the beauty of nature, the joy of a shared experience, and the simple pleasure of good camp dinner. “For those planning a romantic camping escape, these dinners pair perfectly with cozy moments under the stars. Check out our blog on Romantic Camping for ideas to make your getaway even more special.”

    Romantic Camping for Couples in 2025

    When you’re looking for a unique way to connect with your partner, romantic camping offers the perfect opportunity. Imagine a sky full of stars, the cozy glow of a crackling fire, and the calming presence of nature all around you.

    Final Thoughts

    These top 10 camp dinners aren’t just recipes—they’re opportunities to create unforgettable moments. Whether you’re camping by the beach like we did in Destin Beach Camping, or in a lush forest, these meals add a layer of magic to your adventure. So, the next time you’re packing for a trip, remember: A good meal is the heart of every great camping story. What’s your go-to camp dinner? Share it with us—we’d love to try it on our next trip! Until then, happy camping and happy cooking!
    Best yoga mats for traveling
    Uncategorized

    The 10 Best Travel Yoga Mats of 2025

    As a girl who loves exploring the outdoors and staying fit, I’ve always found yoga to be a grounding experience. But let’s face it: carrying a bulky yoga mat while hiking or traveling is a chore! After testing and researching several travel yoga mats, I’ve compiled a list of the 10 best options for 2025. Whether you’re heading to a serene mountain for a sunrise yoga session or simply rolling out your mat at home, this guide will help you find your perfect match.

    1. Yogo Ultralight Folding Travel Yoga Mat with Attached Straps

    Yogo Ultralight Folding Travel Yoga Mat
    Price: $89.00 Brand: YOGO This mat is my go-to companion when I’m on the move. Its innovative folding design makes it as compact as a newspaper, and the attached straps double as a carrying handle. The plant-based, toxin-free material aligns with my eco-conscious values, and the non-slip surface ensures stability during practice, even after a sweaty session. I remember using this mat during a beach hike in Malibu. It felt amazing knowing that one tree is planted for every mat purchased—talk about practicing yoga with purpose! It’s easy to clean, too; a quick rinse under the shower and it’s ready for the next adventure.

    2. June & Juniper Travel Yoga Mat Foldable Lightweight

    Price: $69.99 Brand: JUNE JJ JUNIPER This mat feels luxurious yet practical. The reversible design is perfect for switching between hot yoga and restorative sessions. During my last vinyasa flow in a forest retreat, I was impressed by its excellent grip and lightweight build.
    The added knee pad is a blessing for long holds in poses like pigeon. It’s also an ideal gift for yogis—I bought one for my best friend, and she couldn’t stop raving about its vibrant design!

    3. Yoga Mat Foldable in 6 Combinations

    Price: $27.99 Brand: Foldy Mat This budget-friendly option is perfect for beginners or anyone looking for extra cushioning. The patented alignment system helps maintain proper posture, making it chiropractor-recommended.
    I gifted this mat to my mom, who recently started yoga. She loves the added support for her knees and joints, especially during yin yoga. It folds effortlessly into a compact size, fitting snugly into a tote bag for on-the-go convenience.

    4. Basics 1/2 Inch Extra Thick Exercise Yoga Mat with Carrying Strap

    Price: $21.10 Brand: Amazon Basics Affordable and reliable, this mat is extra thick, offering unmatched comfort for floor-based exercises. I used this mat during a road trip to Yellowstone, and it provided ample shock absorption for my outdoor yoga sessions
    It’s heavier than other options but rolls up neatly with its elastic strap. If you prioritize cushioning over portability, this is a great pick.

    5. ROLL Recovery StretchMat - Folding Indoor and Outdoor Stretching Mat

    Price: $49.99 Brand: ROLL Recovery This mat’s soft-touch surface is a dream for stretching and core workouts. I’ve used it for meditation sessions, both at home and during camping trips. Its non-slip bottom ensures stability, even on uneven surfaces like grassy fields. The compact folding design is another plus—it’s become my companion for outdoor morning yoga routines.
    ROLL Recovery StretchMat

    6. Foldable Yoga Mat - 6mm & 8mm Thick, Large, Lightweight

    Price: $39.79 Brand: Feetlu This mat’s accordion fold design is genius! It opens flat without curling and provides excellent support for poses that need balance. I once used this mat on a rocky cliffside overlooking the Pacific Ocean, and its non-slip surface gave me the confidence to practice without fear.
    The eco-friendly material adds to its appeal, making it a great choice for environmentally conscious yogis.

    7. Navaris Foldable Yoga Mat for Travel - Non-Slip Folding Thin Portable Mat

    Price: $19.99 Brand: Navaris This lightweight mat is perfect for short trips or casual yoga sessions. Its non-slip texture ensures comfort during movement, and it’s super easy to clean.
    I used this mat during a quick weekend getaway to a cozy cabin. It’s not the most padded option, but for its price and portability, it’s a fantastic deal.

    8. Travel Yoga Mat, Non-Slip Exercise Suede Mat with Carry Bag

    Price: $30.99 Brand: SNAKUGA This suede-surfaced mat is ideal for hot yoga enthusiasts. It’s designed to grip better as you sweat, which was a lifesaver during a heated session at a desert retreat. The mat folds into a small carry bag, making it easy to pack for long hikes. I also appreciate its durable build—it has withstood months of use without losing its charm.

    9. Primasole Folding Yoga Travel Pilates Mat Foldable

    Price: $17.90 Brand: Primasole Lightweight and portable, this mat is great for quick stretches or Pilates. It folds neatly into a space-saving size, effortlessly slipping into most backpacks.
    I carried this mat during a hiking trip to Yosemite. It was perfect for short yoga breaks with breathtaking views all around.

    10. Liforme Travel Yoga Mat – Patented Alignment System

    Price: $124.95 Brand: Liforme This premium mat is a splurge, but it’s worth every penny. The patented alignment system and unmatched grip elevate your practice to new heights. I first tried this mat during a yoga retreat in Bali, and it felt like a dream. The eco-friendly materials and thoughtful design make it a top choice for serious yogis.

    My Final Thoughts

    Choosing the right travel yoga mat depends on your needs. Whether you prioritize portability, grip, or eco-friendliness, there’s something here for everyone. Personally, the Yogo Ultralight Folding Mat has been my favorite companion during my hiking and camping adventures.
    Scroll to Top